
Flamed copper earrings
I recently saw some videos on youtube on the copper flame painting method. I had seen some really cool wall art in a craft show that some experienced flame painter had done. I just had to try it myself.
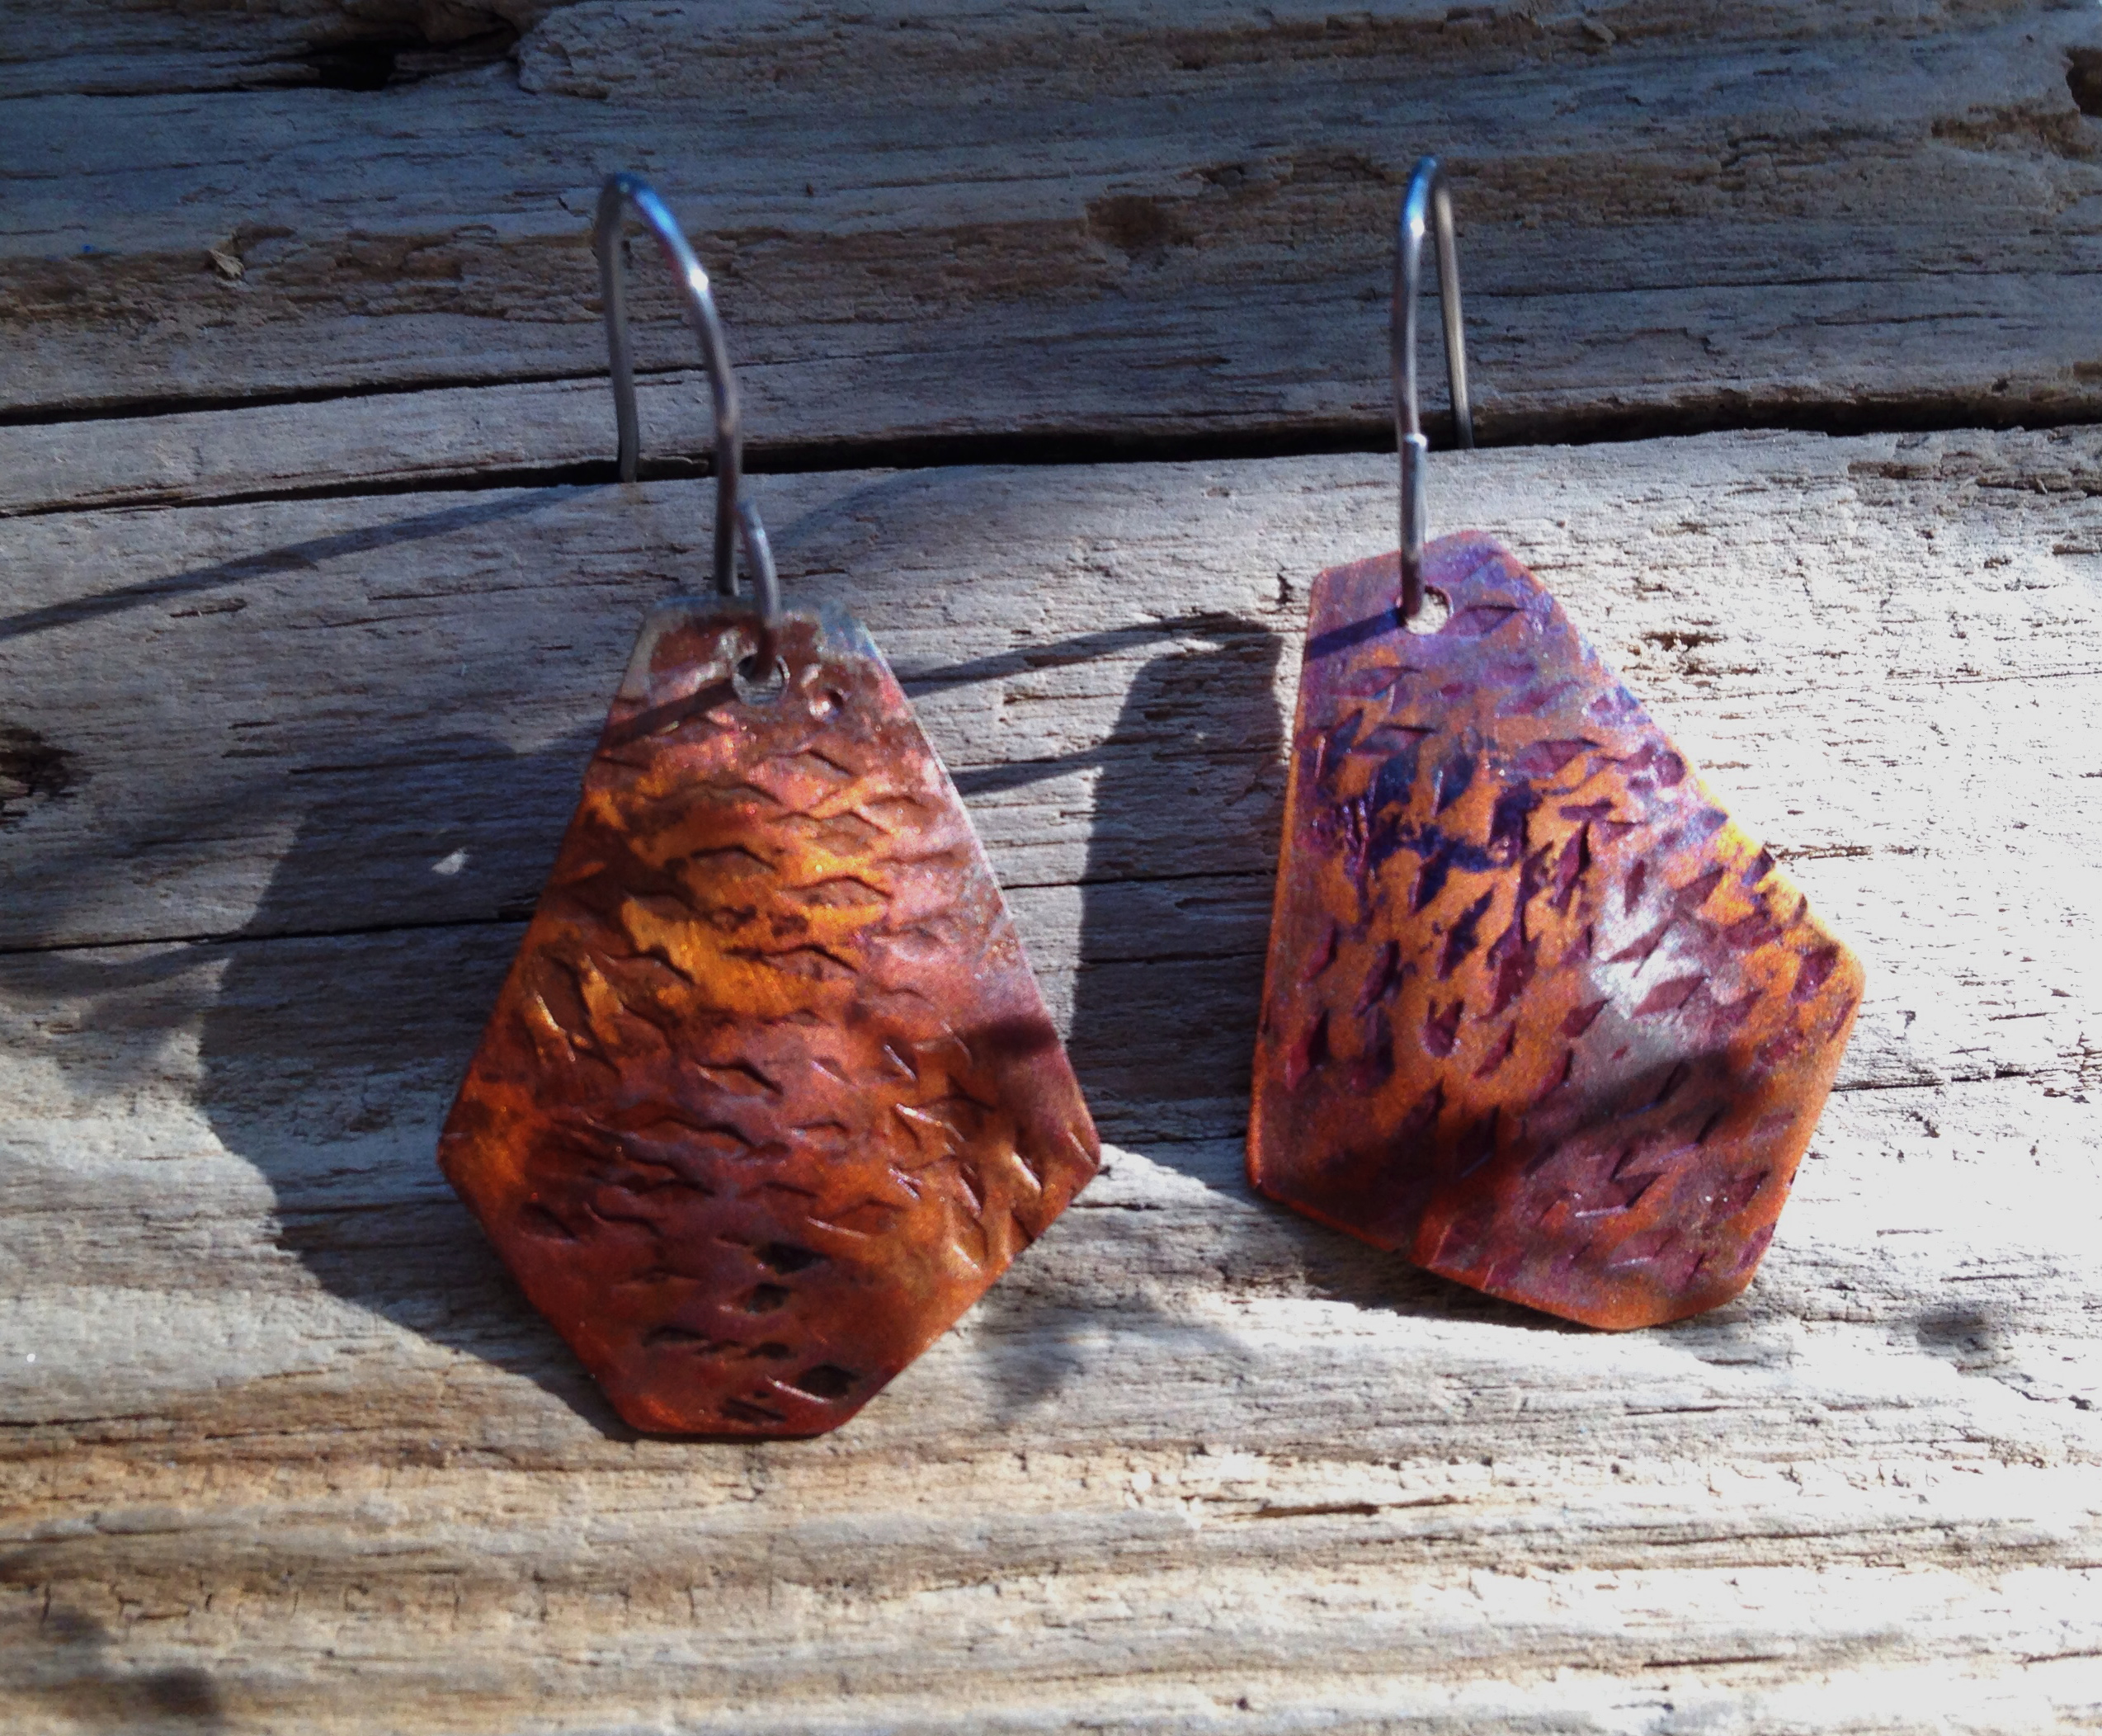
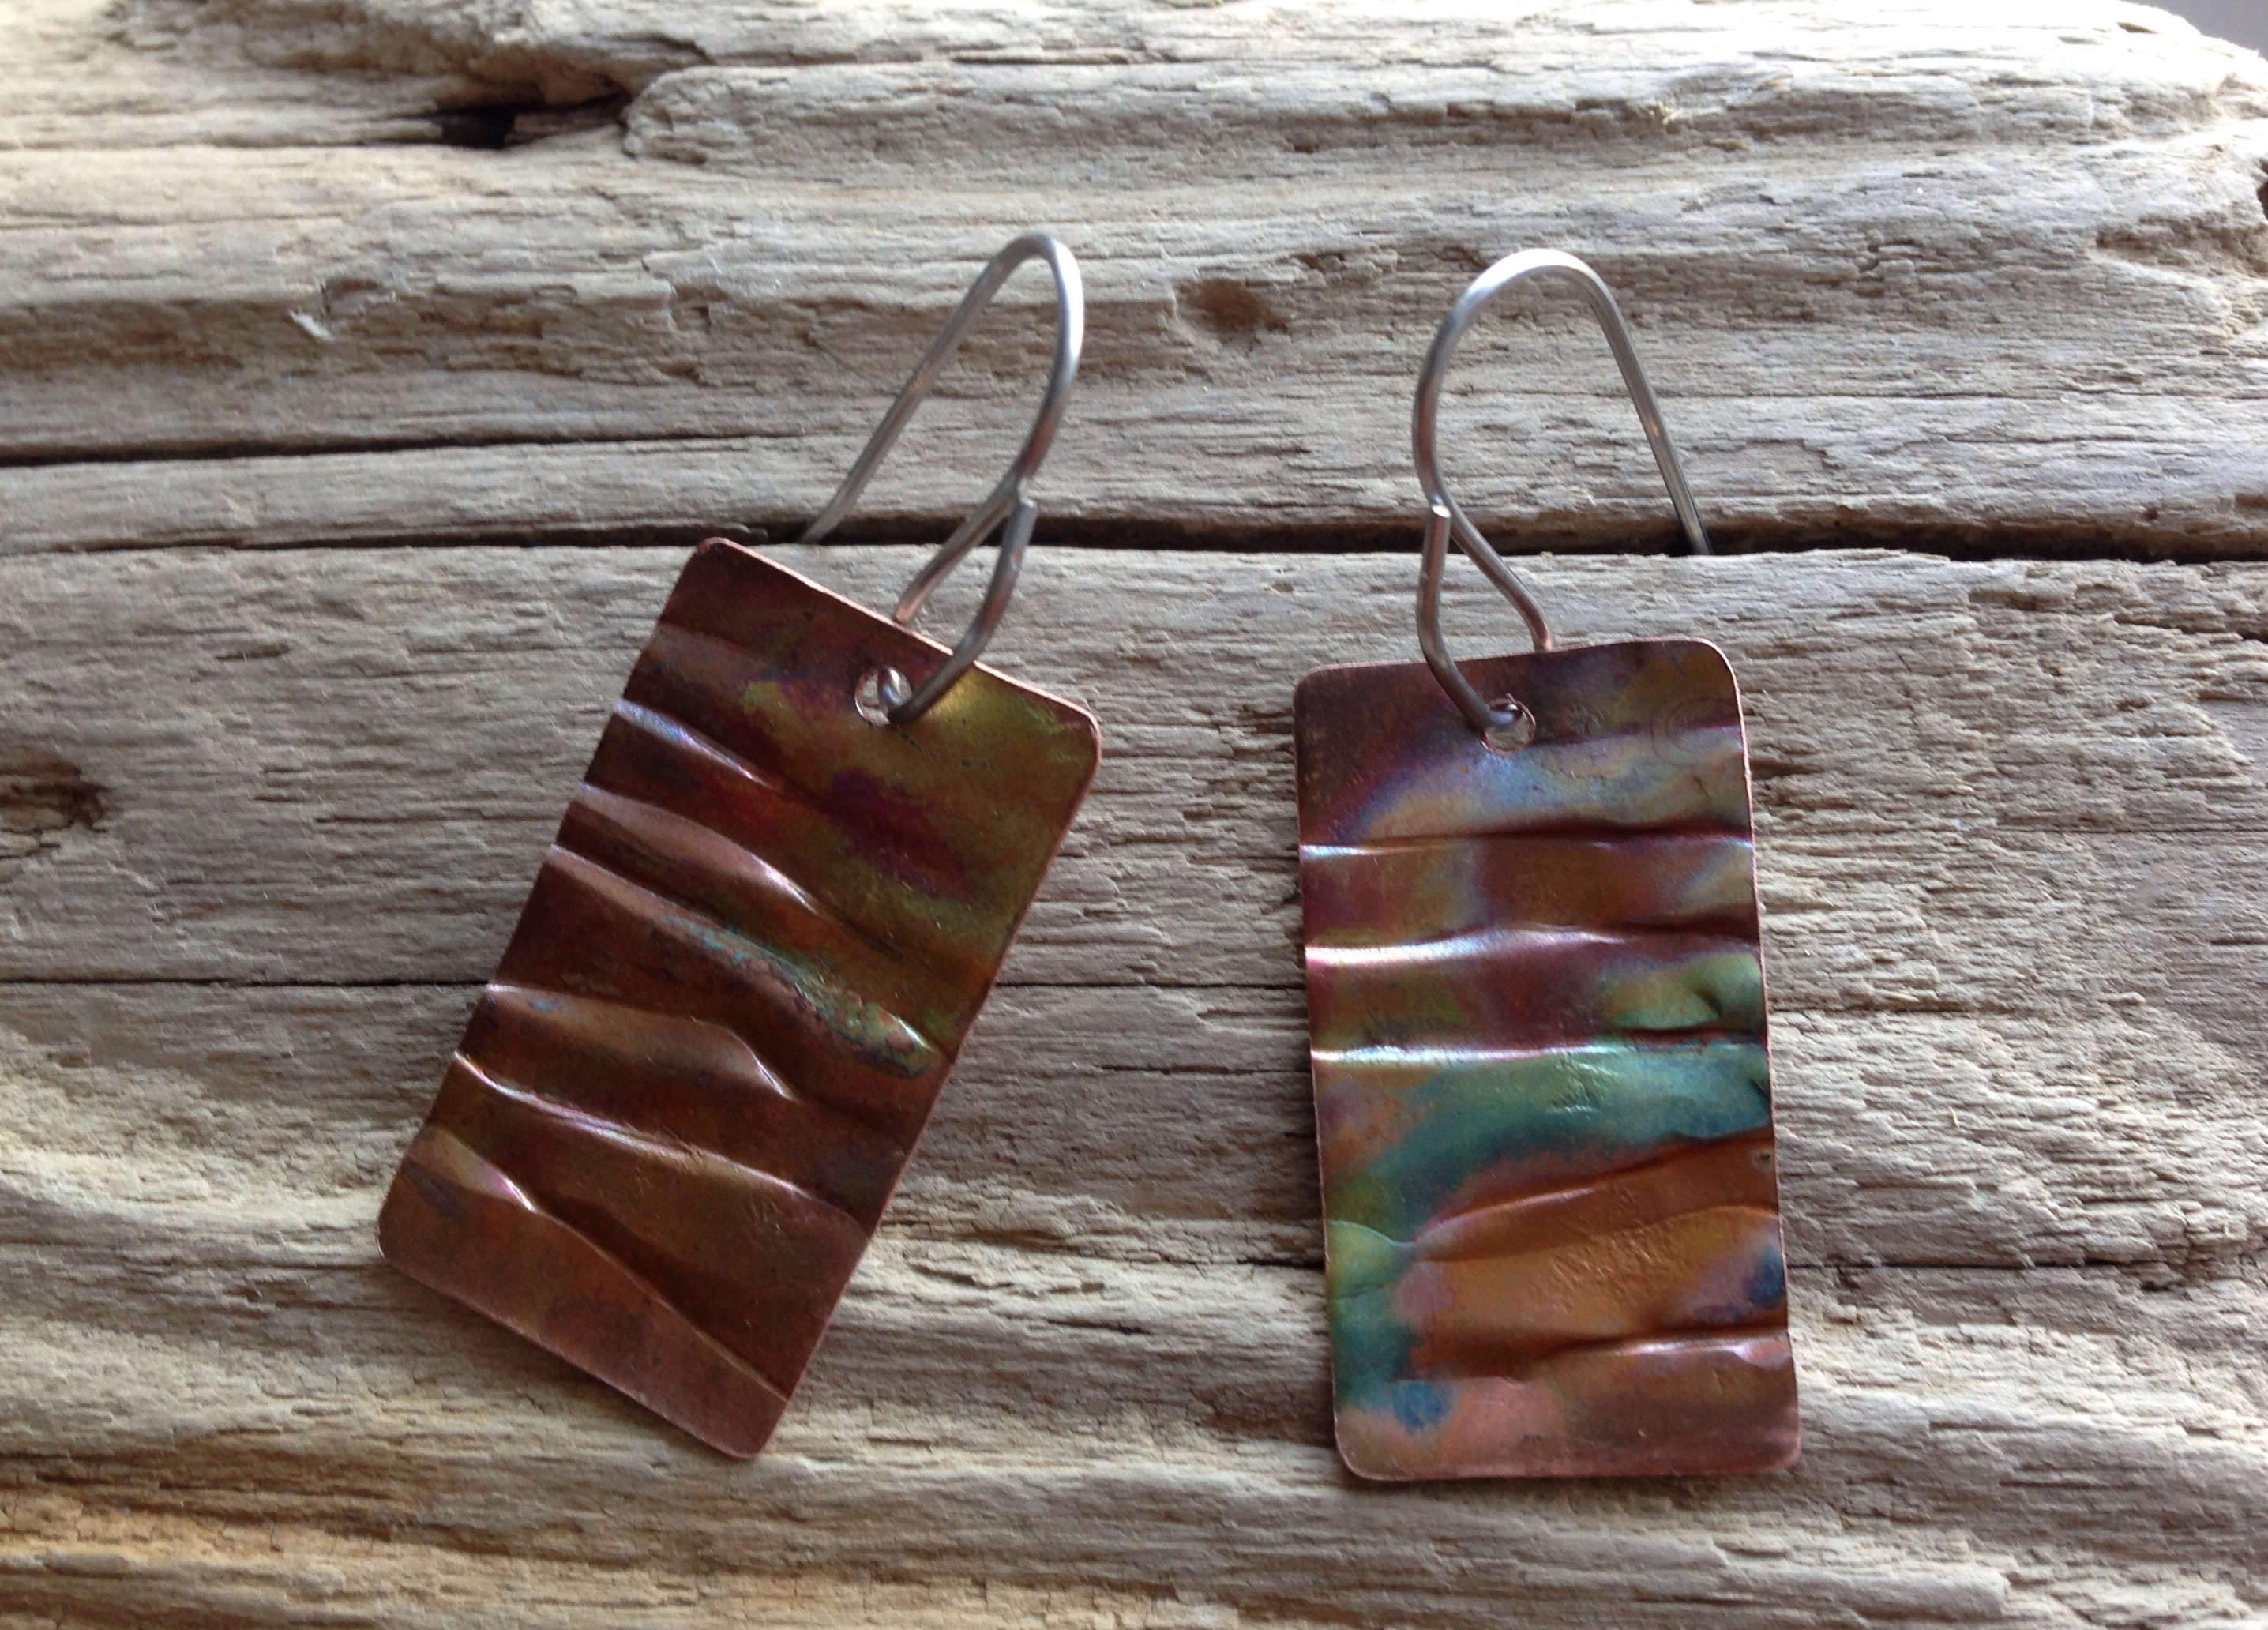
I first cut, sanded, cleaned and textured my copper pieces. I used a new technique for texturing I saw somewhere – I wrapped a wire over the copper and then hammered it to produce texture of lines. It actually looks pretty cool! For the other pair, I used a texture hammer.
Then I dug out my small butane torch. I had actually only used it once, I got it a long time ago when I was supposed to venture into soldering. (I’m still intimidated and only tried it once.) Anyway, the small ones are real easy to use. I had a charcoal block but ended up holding the pieces with pliers.
I was amazed how easily you could get some color on the copper! Yes, getting a pair of earrings to share a similar color, not so easy. Not that they need to exactly match in my opinion, some artistic vision is fine.
First textured with wire, then flamed
Then I experimented with coating the pieces to seal in the color. I found that t is true what they say – the clear coat will dull the blue tones. So, I ended up redoing one of my pairs all over because I didn’t like the dulled blue color. I ended up leaving them more warm orange and yellow.
The cuff I textured and then torched heavily only once. I sanded off the fire scale and it actually looked interesting just like that. It had this sort of dark reddish tone to black that was quite nice.
Now I wish I had tried this sooner. I’m going to be experimenting more soon!

Flamed copper cuff

October 16, 2014 at 6:55 pm
Great textures! I love what you did with the wire-wrapped copper – quite successful! Interesting what you say about coating the metal and how it dulls certain colours. I agree and I tend not to put anything on this type of patina. I find that it is fairly tough and doesn’t really need to be protected (as long as you don’t scratch it). The colour on the cuff is beautiful too, such a warm rich colour. How do you do that one? I have played with it, and I usually dip the metal in hot salted water after heating. You can get so many different shades of orangey-red to purple! I look forward to seeing more of your creations.
October 21, 2014 at 8:09 am
Thank you for the encouragement! I’m glad to hear that the flame painted patina might be fine without protection, that would be good news for the blue tones. I’ll have to test more with it. The cuff – I made some texture with twisting with round nose pliers and then just torched it so that it turned black. (I’m not sure if I went past the official annealing stage, still not completely sure when that is…I was just playing with it.) I let it cool and then sanded the firescale off and I saw this color. (I’m trying to remember if I quenched it in water, but I don’t think so.) The remaining black parts are the remainders of the firescale. (Not sure either if it’s a good idea to leave some of the firescale on like that and coat it.) That salted water dip sounds like a great idea. Have to try it!